Technical Documentation
The Concept
These stories can be told endlessly. Hundreds more are created daily. And yet, they are rarely heard. "You Hear It, We Live It" brings those stories to life. In this project, radios placed around a room broadcast these experiences unceremoniously, creating a chaotic mess people can choose to overlook. These stories are already powerful, which may be too much for some. However, at the click of a button, the noise stops and a single voice will speak to you of their experience. You may not have wanted to hear it, but they had to live it. Now, we must do with this information as we can.

Internal Tech Sketch
The first internal sketch to the technology hidden within the clear box for the installation.
Main Loop: Overlapping Audio
Practice code that plays all of the audio simultaneously until an input (Enter key) is given. The input stops all the audio and will only play one track. Once the track is done, the loop will begin again.
FM Transmitter with Raspberry PI
Practice code that broadcasts a WAV file to any radio channel. This WAV file plays an acoustic guitar cover over the channel 91.4 FM on loop.

Center Radio Sketch
A sketch of the center radio of the installation, which will include the clear box and headphones.

FM Transmitter: Front
The transmission can be achieved for long periods of time. However, the radio may need assistance.

FM Transmitter: Overhead
The radio is completely disconnected from the RasPI. An antenna will help achieve further distances.

Simple Button Wiring
The input will be from a button press. Simple wiring is used to connect a button to the RasPI.

New Radio Transmitter
Due to limitations, the Pi FM library was replaced by a physical radio transmitter.
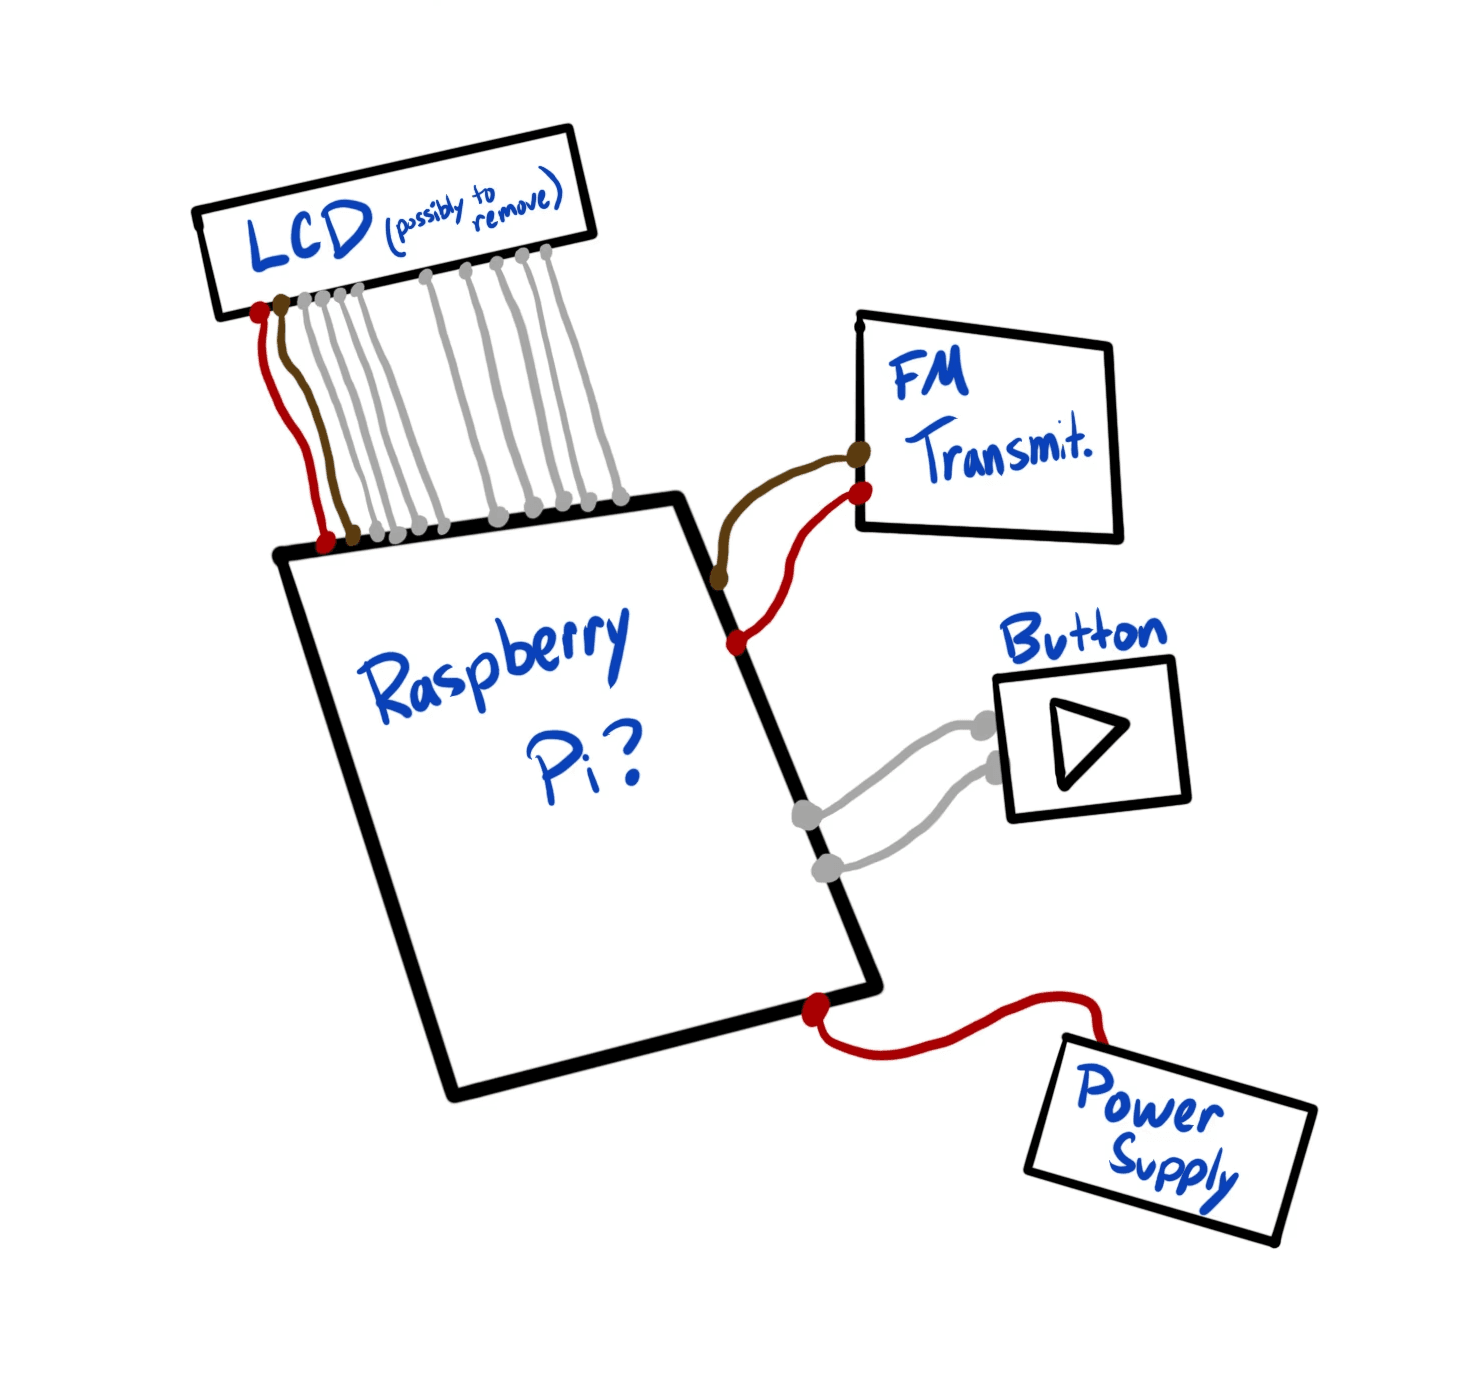
Main Transmission Setup Layout
As the video describes, the Raspberry Pi is connected to a button connected to its GPIO pins. Through its AUX port, it is also connected to a radio transmitter to broadcast the sound to any nearby radio.
User Testing Example
The user interaction is intact and broadcasting the main code loop through an empty radio station channel, being 89.7 FM

UDP Communication Practice
Initial practice with communication between both Raspberry Pi boards through UDP protocol.

UDP + Audio Transmission
Combination of radio transmission of audio files along with UDP communication works seamlessly.

Button Hiding RasPi
To keep the button wiring safe, I taped one of the Raspberry Pis to the bottom of the box.
It will also make cable connections easier.

UDP Client: Working
The Client is the messenger of this code. It hosts the main loop and will send messages to the Server to stop and start when necessary.

